 WHEELIE
A bike wheelie comes down to three things: a strong pedal stroke at the right moment, your weight shifted back with straight arms, and one finger always on the rear brake. The rest is practice. This guide covers bike setup, the step-by-step method, side-to-side balance and specific tips for mountain bikes, BMX, e-bikes and road bikes.
Safety: practice on grass or an empty lot away from traffic, with a helmet and gloves (knee pads help). Never wheelie on busy roads.
Wheelie vs manual: what's the difference
- Wheelie: you pedal to keep the front wheel up, usually seated.
- Manual: you don't pedal. You stand, shift your weight back and use your speed. Used to roll over bumps and for tricks.
This guide covers the wheelie. Many riders find it easier to learn first, because pedaling lets you correct.
Set up your bike
- Saddle: drop it 1 inch (2–3 cm) below your normal riding height for more freedom of movement and a lower center of gravity.
- Gear: not too hard, not too easy. On a mountain bike, the middle chainring or, on a 1x drivetrain, a mid-to-large cog (for example 32 front with 21–24 rear). Too easy and the front shoots up; too hard and it won't lift.
- Rear brake: it must work well. You'll cover it with one finger at all times.
- Tires: normal pressure. Soft tires make the bike unstable.
- Flat pedals: better than clipless while learning, so you can step off.
Step by step: your first bike wheelie
- Ride slowly: pedal seated at walking pace, about 3–6 mph, on flat ground or a gentle uphill.
- Set your pedals: dominant foot forward, crank at about 1–2 o'clock, ready to push.
- Cover the rear brake: index or middle finger on the lever, always.
- Compress and lift: dip the front slightly, then in one move shift your torso back with straight arms and give a strong pedal stroke. The lift comes from the pedal stroke and your weight shift, not from pulling the bars.
- Keep pedaling: smooth, steady strokes keep the front up. If it drops, pedal harder or lean back a little.
- Too high? Feather the brake: a light touch of the rear brake brings the front back down. This is what keeps you from looping out.
- Land straight: let the front come down with the bars straight and ride away.
At first, lifting the front 8–12 inches for a couple of pedal strokes is enough. The feeling you're after is lightness: the front floats and the bike almost balances itself. That's the balance point.
Side-to-side balance
Falling sideways is more common than falling back. To correct:
- Knees: if the bike leans right, move your left knee out (and vice versa).
- Bars: small steering inputs. The wheel is in the air, but steering still shifts your weight.
- Eyes ahead: looking at the wheel throws you off balance.
- Speed: a little more speed adds stability.
Mountain bikes, BMX, e-bikes and road bikes
How to wheelie a mountain bike
Mountain bikes are the easiest to learn on: wide bars, easy gears and strong brakes. A hardtail works great. On a full suspension bike the rear shock soaks up some of your pedal stroke, so push harder, and lock out or firm up the shock if you can.
How to wheelie a BMX
A BMX has a short wheelbase and one gear: the front lifts easily and loops just as easily. The rear brake matters even more. Many BMX riders prefer manuals, but you learn the wheelie the same way.
How to wheelie an e-bike
The motor helps lift the front, but the bike weighs 45–55 lb. Use the lowest assist level (eco): in high modes the power arrives suddenly and the front shoots up. Remember that the assist starts and stops with your pedaling. The rear brake is still your lifesaver.
Road bikes and heavy bikes
A road bike can wheelie, but drop bars and clipless pedals make it harder and riskier. On a heavy bike (cruiser, e-bike, downhill bike) use an easier gear and a stronger stroke.
Common mistakes
- Pulling with your arms: the lift comes from the pedal stroke and your torso.
- Gear too easy: the front shoots up and you loop out.
- Finger off the brake: the main cause of falling backwards.
- Stopping pedaling: the front drops straight away.
- Looking at the wheel: you lose side-to-side balance.
Drills to learn faster
- Short lifts: 20–30 times: one stroke, front up, brake, down.
- Brake drill: go a little higher each time and bring the front down only with the brake, so you learn to trust it.
- Gentle uphill on grass: the front lifts more easily uphill, and grass is softer to fall on.
- Count your strokes: aim for 3, then 5, then 10 strokes with the front up.
Train with Wheelie Trainer
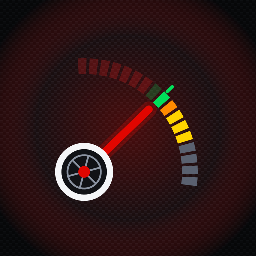
With Wheelie Trainer the phone on your handlebar tells you when you're at the balance point: faster and faster beeps as the front rises, a steady tone when you're balanced, an alarm if you're about to loop out. Record video with telemetry and compare your wheelies on the leaderboard.
Frequently asked questions
How long does it take to learn to wheelie a bike?
With 15–20 minutes of practice a day, many riders manage a few yards within 1–3 weeks. Holding long wheelies takes months.
Should you wheelie seated or standing?
For a classic wheelie, seated: it's more stable and you can pedal better. Standing is for manuals.
What gear should I use to wheelie a mountain bike?
A middle gear: middle chainring and a mid-to-large cog, or on a 1x drivetrain one of the larger cogs but not the easiest. It should allow a strong stroke without the front shooting up.
Can you wheelie a bike with no hand brakes or a coaster brake?
It's much more dangerous: the rear brake is the main way to avoid looping out. A coaster brake works by pedaling backwards, which is hard to modulate. Learn on a bike with a lever-operated rear brake.
Is it easier to learn a wheelie or a manual first?
Most riders find the wheelie easier, because pedaling lets you correct and the rear brake gives a safety net. The manual relies purely on body position and balance.
Train with Wheelie Trainer
Your phone on the handlebar guides you to the balance point with sound. Free for iOS and Android.